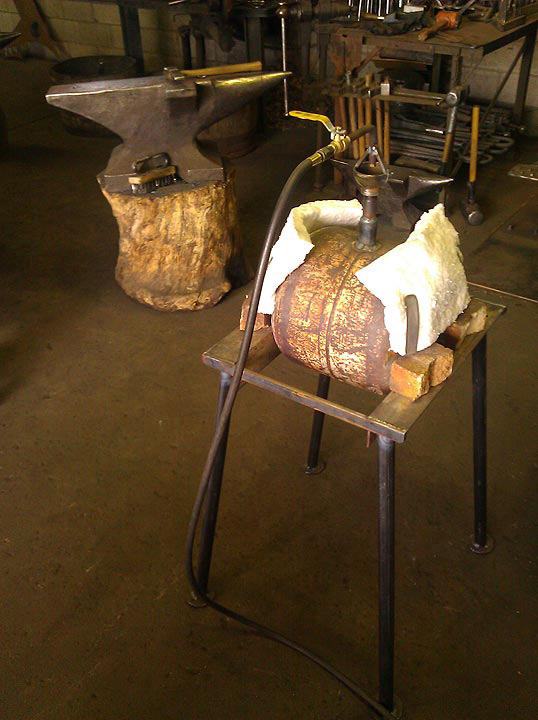
The forge burner assembly mounted on a stack of firebricks - making a primitive, yet very effective gas forge.
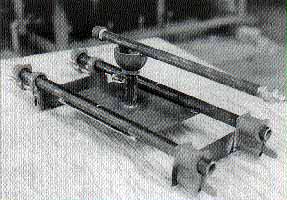
The basic forge burner assembly, including the two pipe clamps which hold four firebricks tightly together as a top for the forge.
The Mendocino Art Center, which is well known for its classes in many of the arts and crafts, is starting to sponsor a few classes in blacksmithing. Apparently, one of the first in this field was our recent forge building conference on September 12 -13, 1998.
I don't think they could have made a better choice for starting the program than Helmut Hillenkamp. The subject he chose was also most appropriate for beginning blacksmiths. Obtaining a forge is one of the first requisites for anyone who hopes to learn the fundamentals of blacksmithing.
Helmut, besides being recognized worldwide for his blacksmithing skills, has spent many years developing a gas forge that could easily and cheaply be built from locally available materials by the Equador smiths to produce iron work while burning their cheapest fuels.
For any of you who have not had a chance to see one of Helmut's (poor man's atmospheric) forges, they are the epitome of simplicity. They are made up of readily available standard pipe fittings and ordinary firebricks. In the ones made in Equador, they use their standard red construction bricks, instead of firebricks, and still have measured temperatures as high as 2880F (well over welding temperature). The life expectancy of such bricks is only a few months, however they are easy to replace.
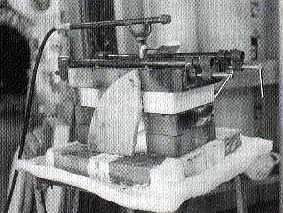
I won't try to explain all of the construction details of this forge; however, its simplicity is readily apparent in these photographs and the drawing.
Gas coming into the forge is controlled by: (a) the pressure regulator setting and (b) the size of the brass orifice opening. The volume of air allowed to mix with the gas is controlled by: (a) the altitude of the shop and b) an adjustable bolt located in the vertical 3/4" burner pipe.
The forge pictured above is operating with a broken piece of kiln shelf material leaning against the open door. Actually, a more satisfactory door could be made by setting a few more firebricks across the opening. In an atmospheric forge such as this, a tight-fitting door is not wanted. Any buildup of internal pressure interferes with the function of the venturi restricting the flow of incoming combustion air. In the lower picture you can see how two pipe clamps have been tack welded onto the top plate so that four lightweight fire bricks can be clamped together to form the top for a small forge. This detail was not included in the construction drawing, but depending upon the final shape of forge wanted, can easily be added.
Additional burners can be cloned and fed from a common manifold if a larger heated area is required. According to Helmut, one burner will heat up to about 8" of stock, and if this is inadequate, each additional burner will heat another 4". It is amazing, however, how seldom you will find the one burner is inadequate for any particular job. The flexibility in shape that is offered by this approach will take care of almost any situation.
The height of the burner outlet from the forge floor is somewhat critical. If it is less than five inches, the combustion of the gas will not be complete before it strikes the floor bricks. If this situation occurs, you will see a small round dark spot under the burner on the incandescent bricks. If, however, the height is too great, the flame will go out. So you may have to try a few different wall heights to find the optimum for your particular usage.
Anyone attempting to make one of these forges on his/her own should proceed with due care. Working with combustible gas requires the exercise of extreme caution. Such gas is completely unforgiving of careless workmanship and/or inattention during use.
The materials needed to fabricate one of these forge burner assemblies are listed in English as follows (refer to drawing in link above):
1. One 1/2" pipe cap (all pipe and fittings are to be unplated).
2. 17" of 1/2" pipe, threaded both ends.
3. Coupling, 1/2" pipe thread to hose fitting connector.
4. One 2" to 3/4" bell reducer.
5. One brass orifice fitting drilled with a: #66 drill for sea level operation. #67 drill for 3,500 ft. elevation operation. #68 drill for 7,000 ft. elevation.
6. One piece of 3/4" pipe 4" long.
7. One piece of mild steel 1/8" x 8" x 8".
8. One piece of 1" pipe 2 1/2" long
9.&10. 20 feet of 200 or 300 PSI 1/4" propane hose with appropriate end couplings.
11. One 0-100 PSI gas pressure regulator.
12. Nut, 3/8" NC (unplated).
13. Scrap to provide handle for turning the 3/8" bolt.
14. One 3/8" bolt, 2 1/2" long.
Helmut had enough time after most of the forge assemblies had been completed to demonstrate a few blacksmithing fundamentals to some of the attendees who were anxious to put their new forges to work. Nine aspiring blacksmiths attended the workshop in Mendocino and each took home a completed forge burner assembly, including a pressure regulator and hose. Once they got home, a few fire bricks and a tank of propane would enable them to actually try some of Helmut's blacksmithing ideas.